“THE TOM FORD” TOASTER
Create a new design for a product that aligns with the visual language of an existing product line, considering formal attributes like size, materials, finishes, and textures.
Timeline: 4 weeks, 80+ hours
Role: Product Designer and Model Maker
Term: Fall 2022
Software: Adobe Photoshop, Procreate
Tools and Materials: Cardboard, XPS Foam, PU Foam, HMA, 3M Bondo 907, Bamboo BBQ Skewers, Tape, X-Acto Knife, Tweezer, Hand-Filing Tools, Rust-Oleum Painter’s Touch 2X Ultra Cover White Spray Primer, Gold Spray, and Matte Black Spray
INTRODUCTION
The objective for this project was to extend the visual language of an existing product or product line with a new design of our own. Specifically, we were going to be creating a simple object that would fit the size of your hand and that would not be too expensive to manufacture. This product needs to speak the same design language as the existing product. All formal attributes should be considered, including colors, materials, finishes, and textures.
PRODUCT EXTENSION
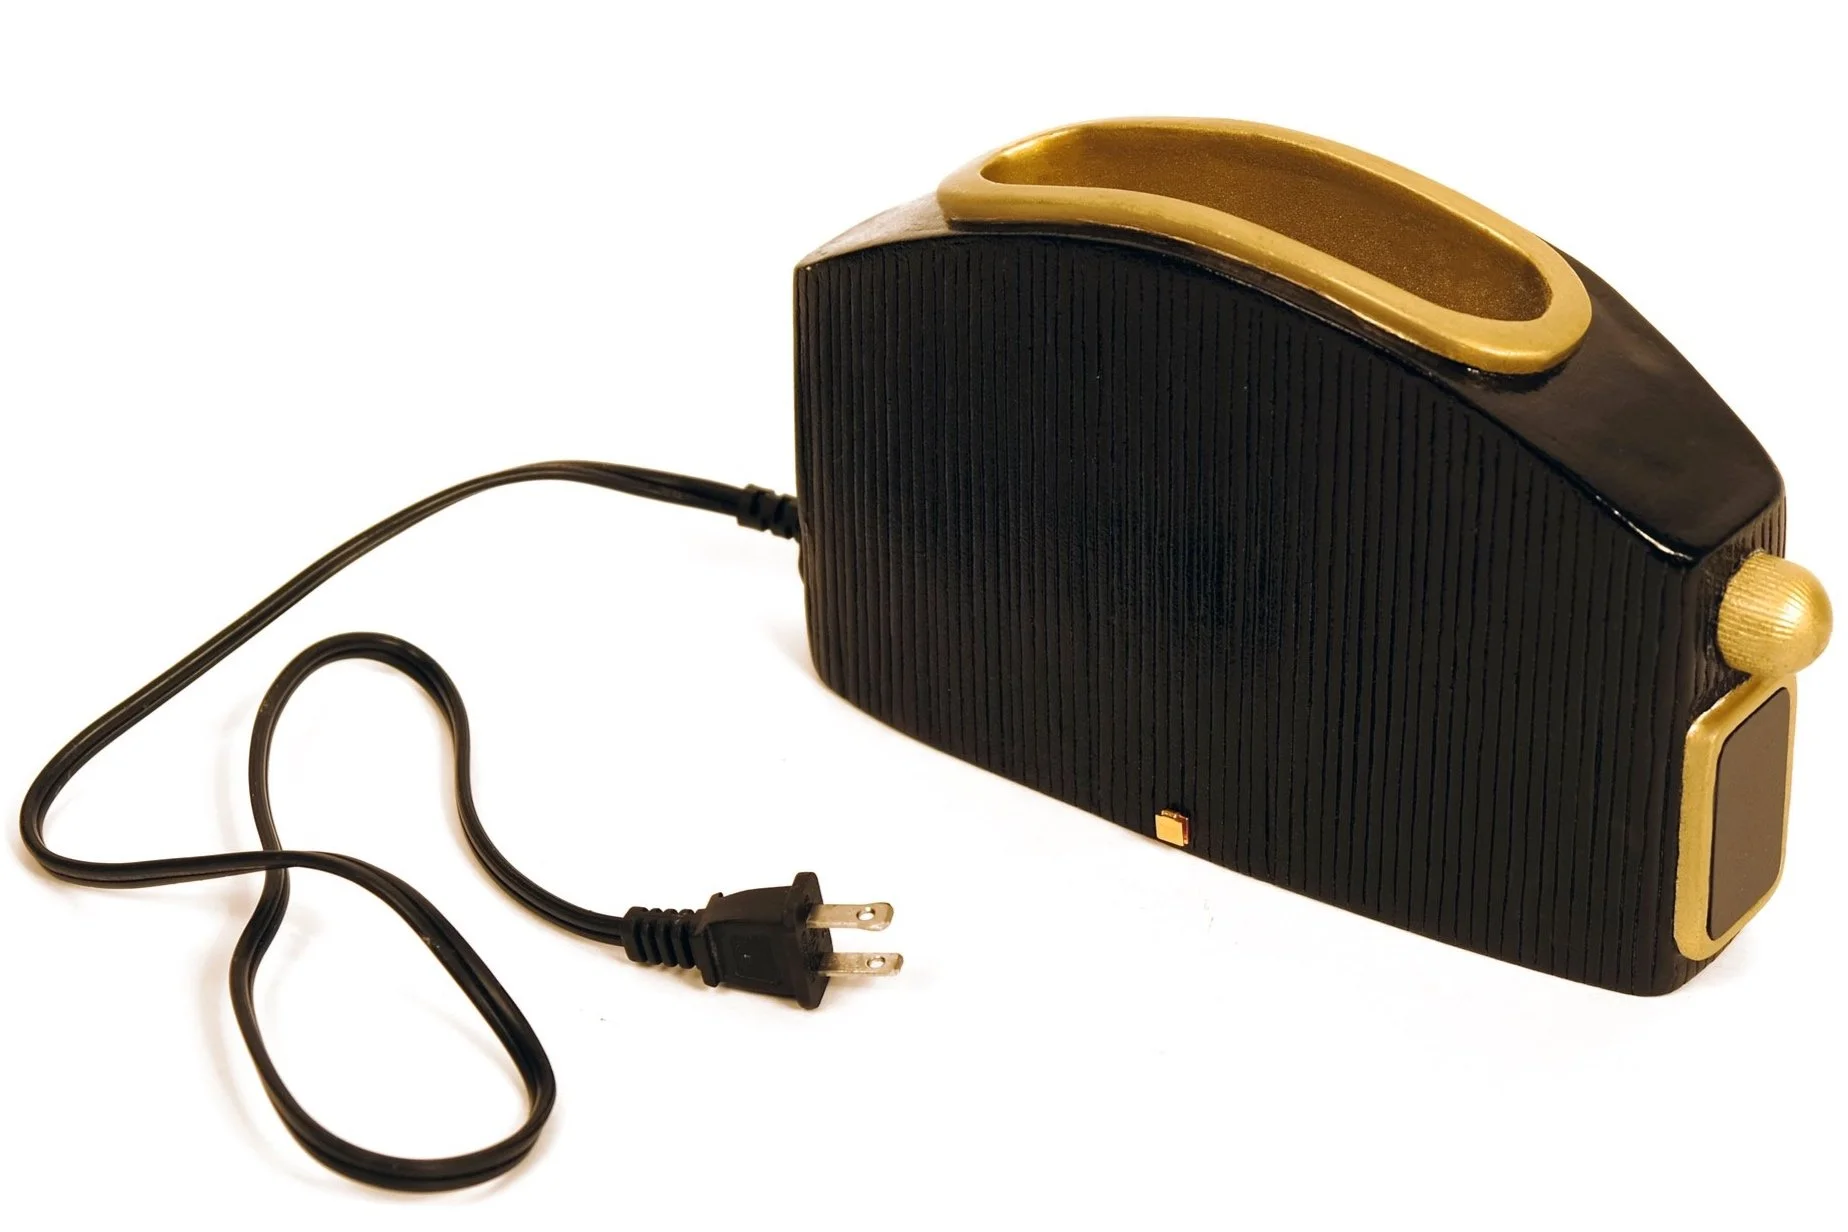
The product I chose for this project was the Tom Ford “Black Orchid” Eau de Parfum. This is a product I have been using for a couple of years and admire it as a remarkable piece of work. The bottle's shape is bold and elegant, with its signature curvature and elongated neck. It is made of thick, sturdy glass, giving it a luxurious and weighty feel. The deep black color of the glass adds to the sense of mystery and sophistication, reflecting the sensuality of the scent inside. The design language of the bottle is clean and minimalist, with no extraneous detailing, allowing the perfume's name and brand to stand out. The gold color of the initials badge shines next to the black color of the bottle. The finish of the bottle is also noteworthy, with a matte texture that contrasts well with the glossy black lid, adding depth and dimensionality to the overall design.
SKETCHES
I explored how to transform the Tom Ford perfume bottle into another product using the same design language. I sketched various products, such as kitchen knives, kettles, and other kitchen accessories. I landed on toasters since I found out that there’s more to be done with them. I had more flexibility in playing with the form, colors, finishes, and transitions.
LOW FIDELITY MODELS
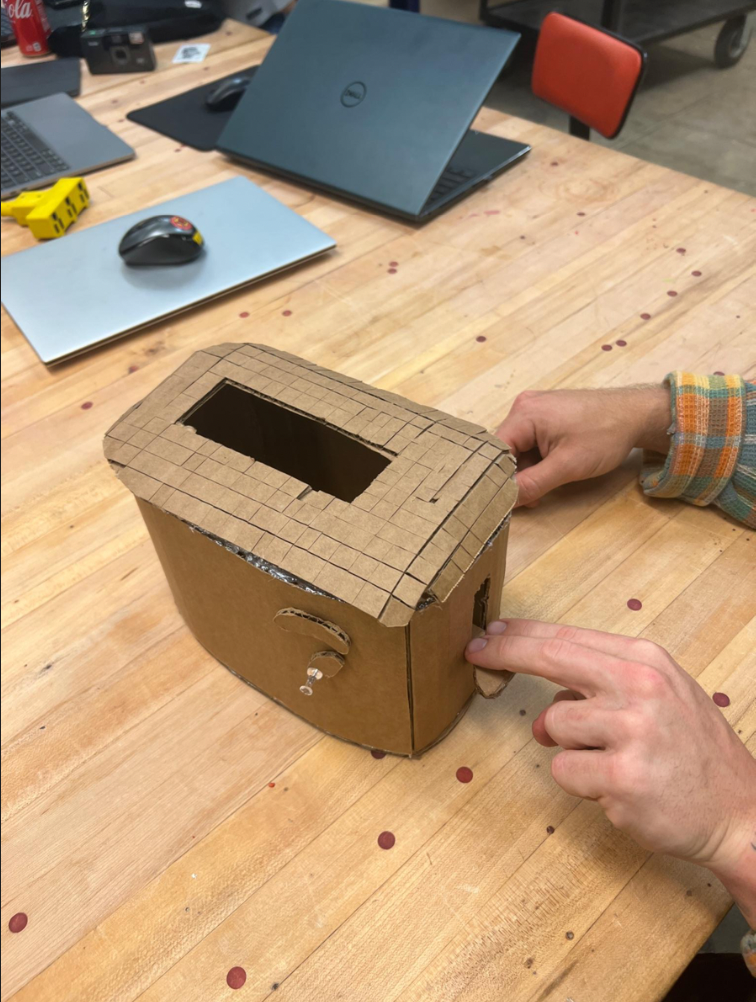
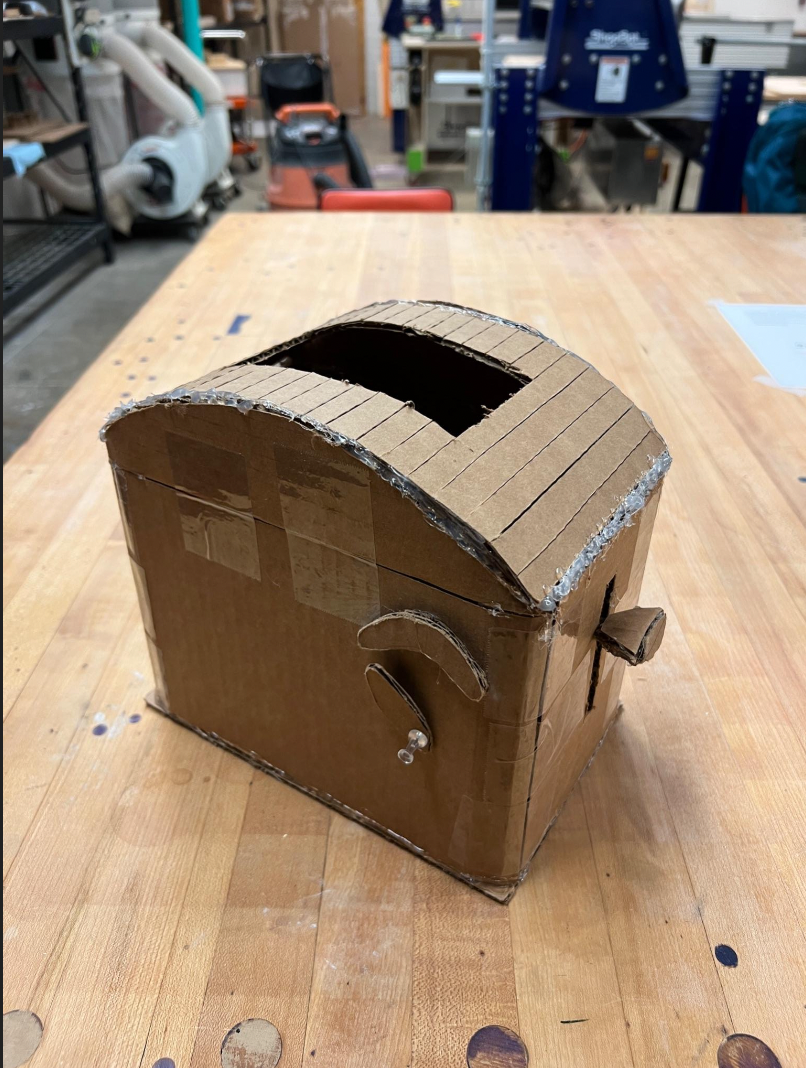
Creating low-fidelity models before moving on to the final version was incredibly helpful in several ways. It was quick and easy to make, which helped me create multiple versions and experiment with different ideas without wasting too much time or resources. I used them to bring my vision to life and test and refine my design's basic functionality. This allowed me to identify any issues early on and make improvements before investing more time and money into a final version. I gathered feedback from potential users, which helped to refine the design and ensure that the final version met the needs and preferences of the target audience.
HIGH FIDELITY MODELS
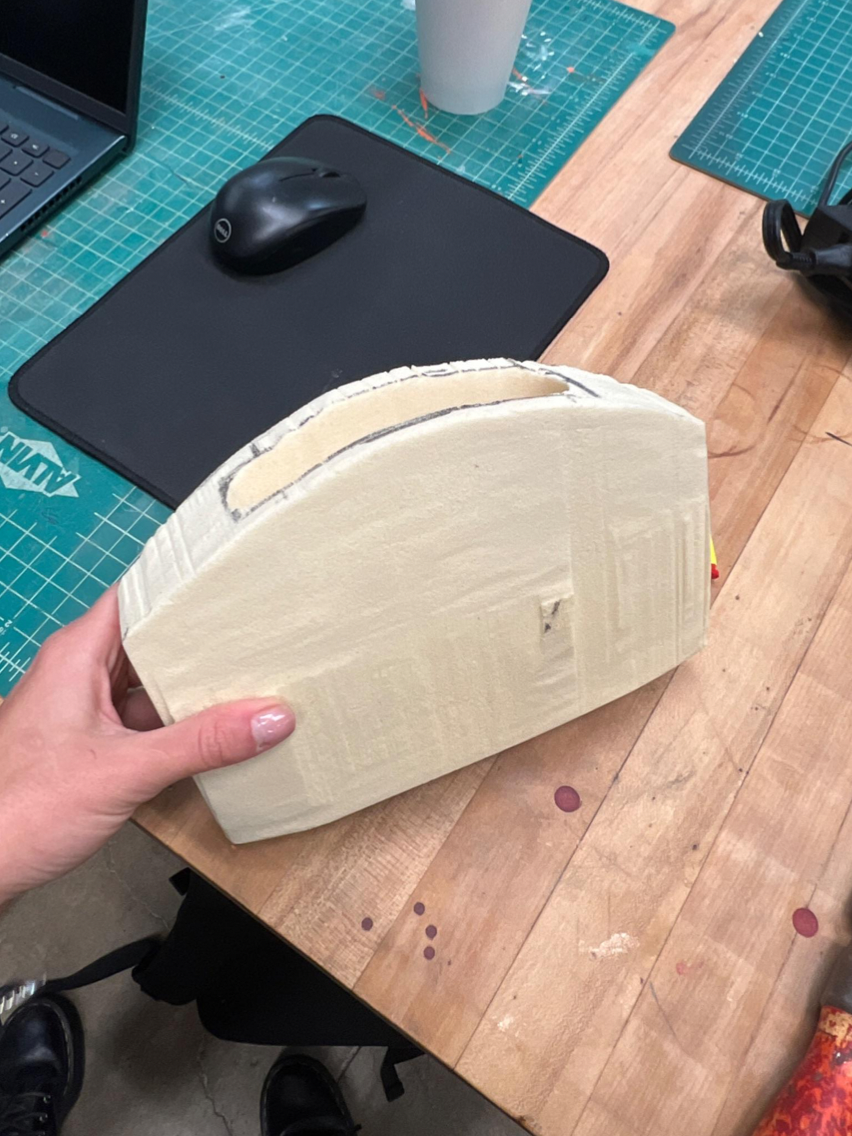
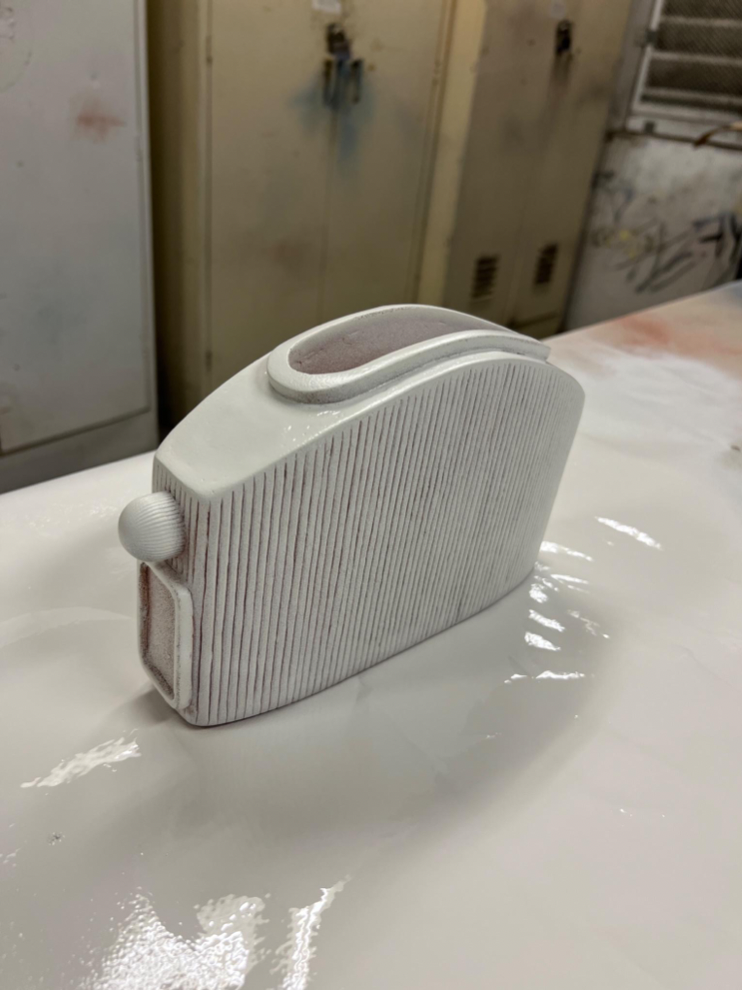
I used a marker to specify which parts of the foam I wanted to cut. Using hand-filing tools I shaped the PU foam and rounded up the top part of the toaster to implement the curvilinear part of the perfume bottle.
After sanding down the PU foam to my desired shape, I started the process using the drill press machine to make an oval-shaped hole on the top part of the foam.
I used BBQ skewers to replicate the ripped texture of the perfume bottle. I wanted to have that texture all around my model and since the bamboo skewers were so difficult to sand down, I had to shape them perfectly before I glue them on the surface of the foam.
Taping the skewers before cutting them with the band saw helped with having a cleaner cut, and then used circular and horizontal sanding machines to smooth down the edges.
I also curved down the extra foam I had left for the top part of the toaster for extra detail and aesthetic.
In the meantime, the glued skewers slowly dried, and I began the process of bondoing. I used a 3M Bondo 907 for that purpose.
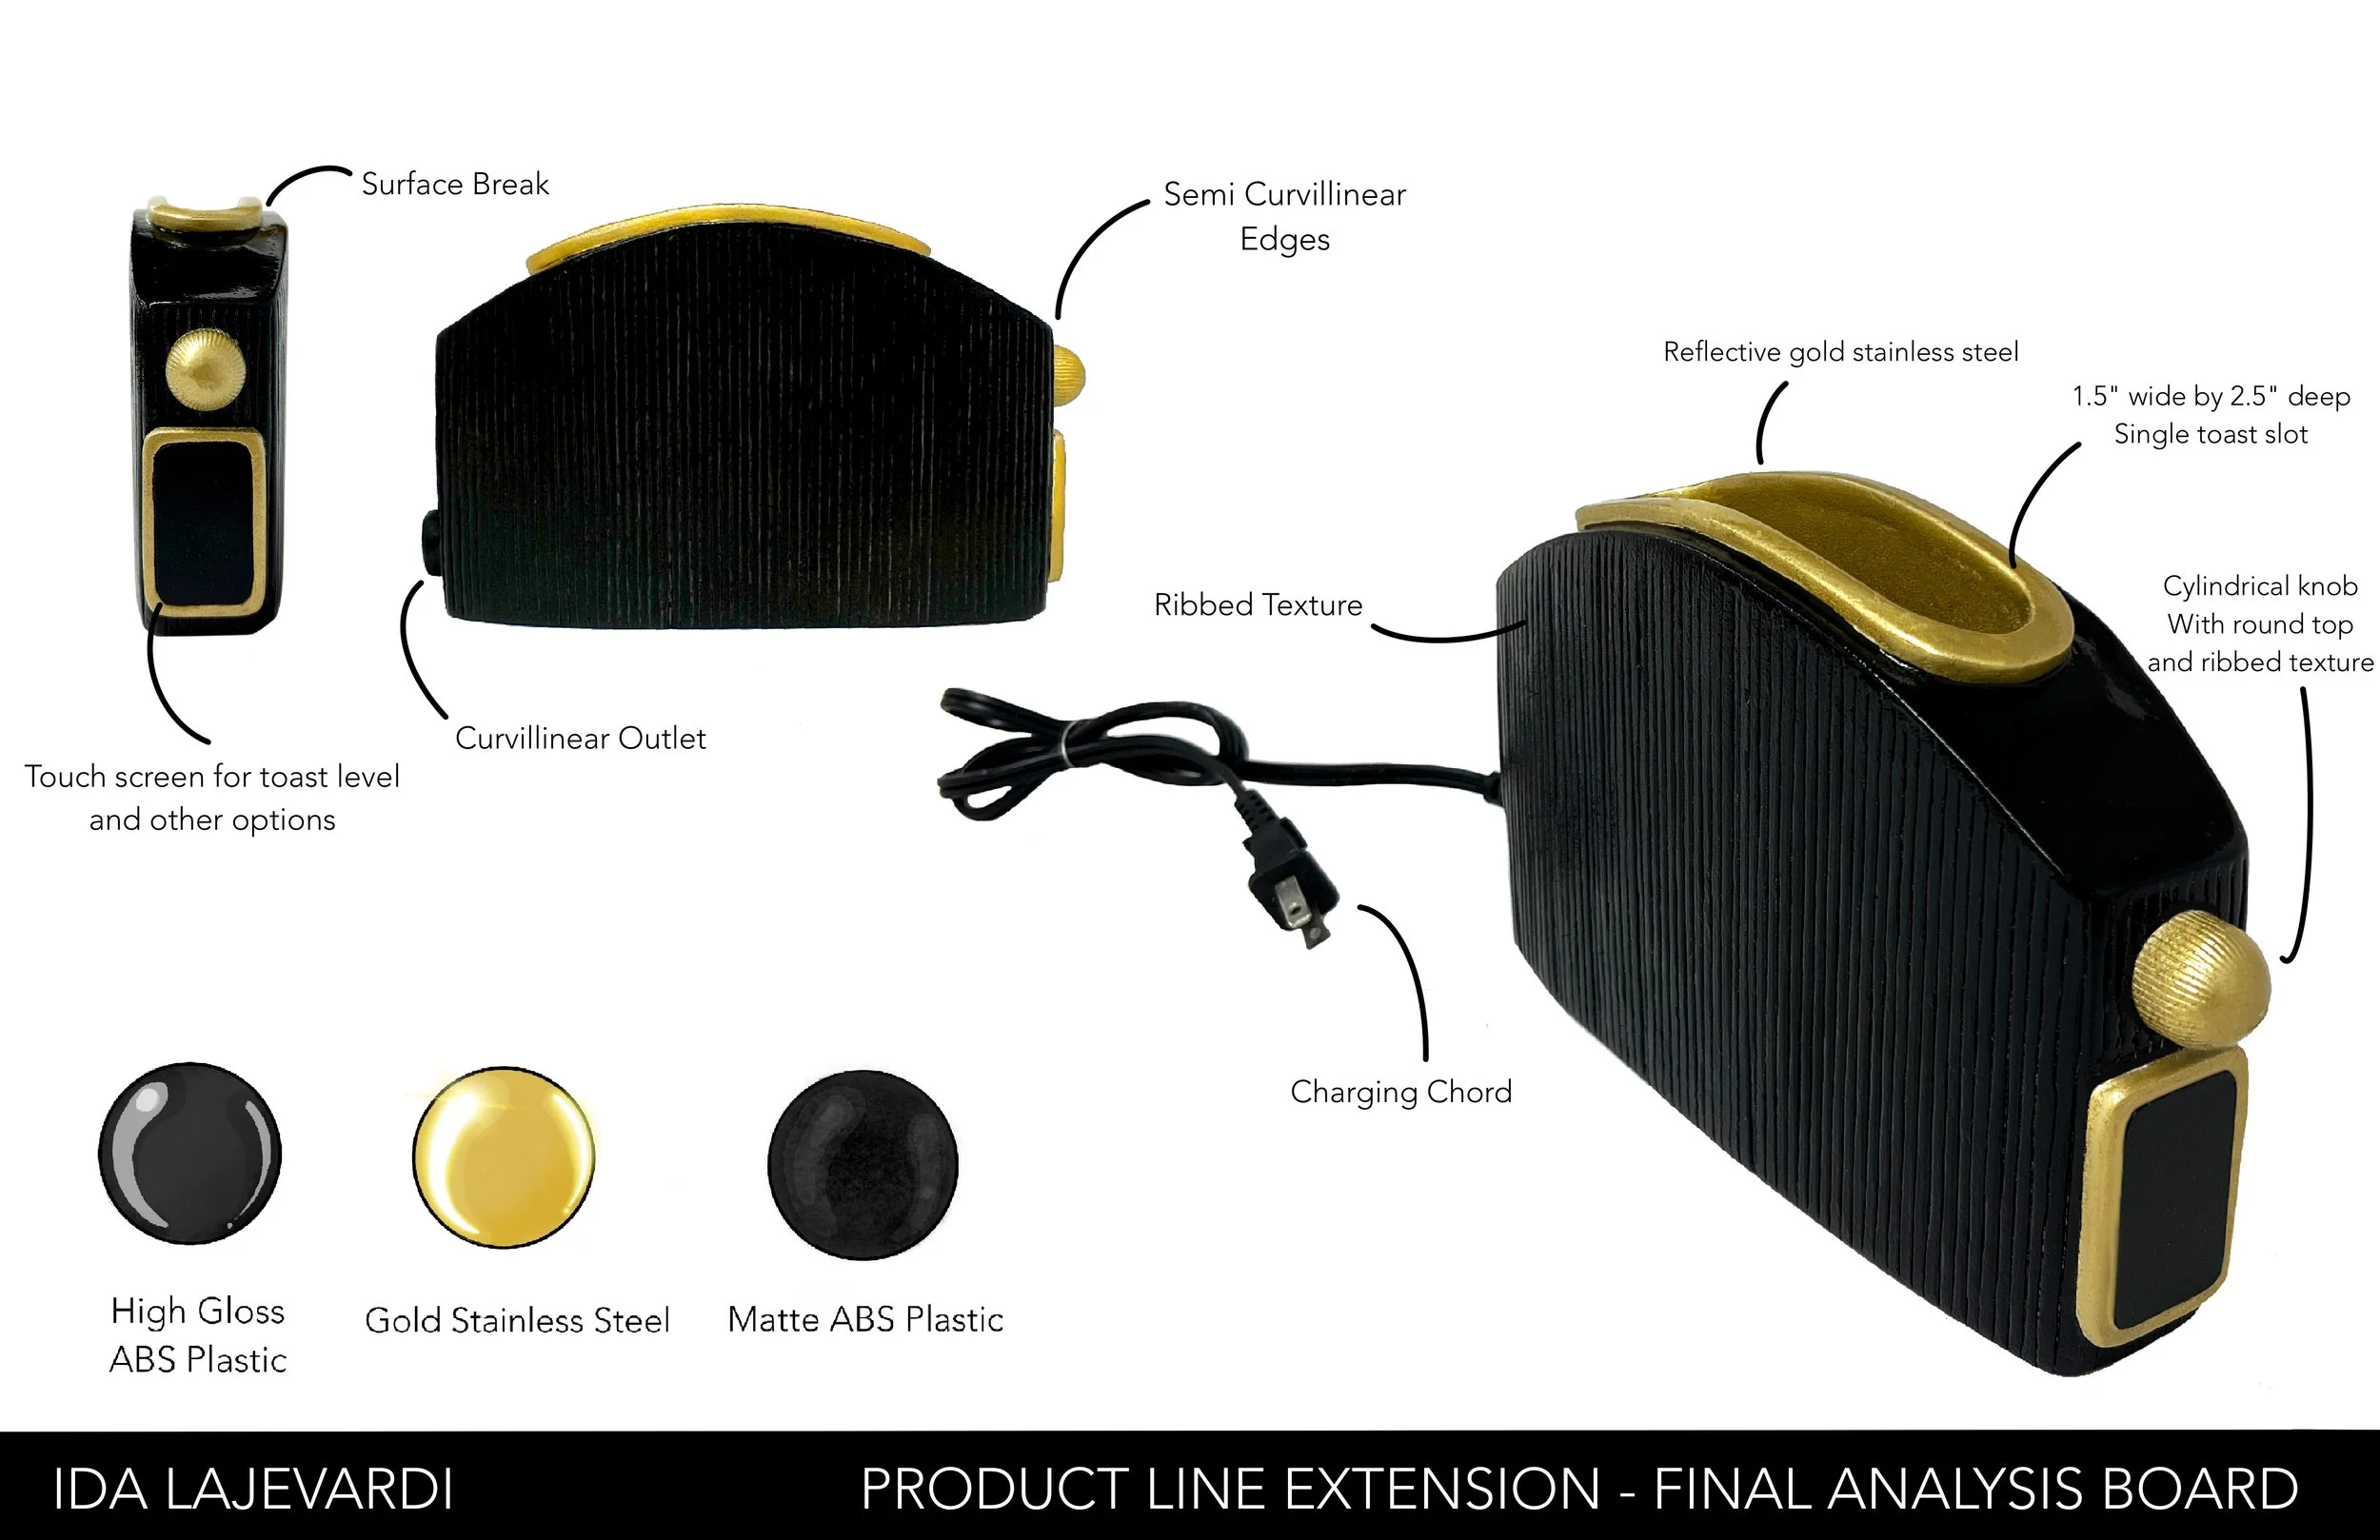
Using an X-Acto knife and a small thin sheet of polypropylene plastic, I curved a small rectilinear PU foam and shaped the plastic in order for it to fit in it. The idea was to have some sort of rectilinear shape on one side of the toaster to implement the gold square which was on the front surface of the perfume bottle.
The sheet of plastic was to replicate a touch screen on which you could see your toast level and other options.
On the other side of the toaster I added another small detail. This round part is an outlet of which the plug would be sticking out. I glued it using two part epoxy glue.
I took advantage of the cap of the perfume bottle and used it to serve the purpose of a knob. This knob is for adjusting temperature and giving you multiple options which you will be seeing on the screen beneath. I used the same two-part epoxy glue to stick it to the body of my model.
I was taking advantage of the time and continued bondoing at the same time as well.
I bondoed the whole model 5 times overall. The Bondo was taking its time and each layer took approximately 4-5 hours to fully dry.
Small flaws and imperfections became visible each time after the Bondo dried out and prepared the model was sanded down to become as smooth as possible. I used 400,800 and 1000 sandpaper to smooth it down.
I used a pointed tweezer to remove the extra Bondo stuck between each bamboo stick. This part took the longest time and required a significant amount if patience and attention to detail. I did this process after each time of bondoing before applying a fresh layer.
After getting the model as even as it could get with Bondo, it was time to prime. Priming is a step in the painting process that helps seal and prepare the model for paint. This step gave me a nice, even base color tone to start with. I used Rust-Oleum Painter’s Touch 2X Ultra Cover white spray primer, which took almost 12 hours to dry fully.
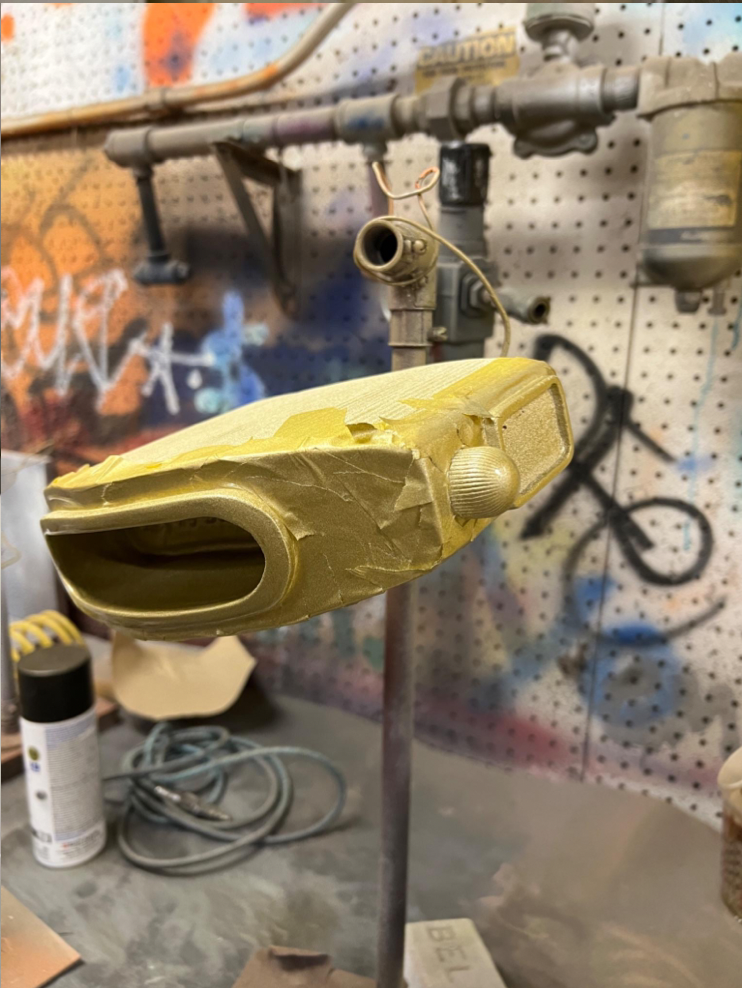
I then put the model on a stick and hung it from a pipe to access all surfaces before painting.
FINAL LOOK-LIKE MODEL
USABILITY TESTING
The painting process started with me covering some parts of the model with masking tape. Since the model was all glued together and in a single piece, I figured the best way to start painting is to paint the gold parts first.
The knob, the toast slot and the outer frame of the touch screen were painted gold first. After they dried, I covered those parts and sprayed the rest of the model with a high gloss black paint.
I conducted usability tests with five users - these users walked through their actions with me, and the results of the tests helped clarify which parts of the prototype were easy to use and which needed improvement.
Insights:
• Users enjoyed the compatibility and overall look of the model; 100% of users agreed that this model was easier to use than the low-fidelity prototypes in terms of size and placement of features.
• Featuring easy-to-use controls and settings that allow you to quickly and easily toast your bread or bagels to the desired level of crispiness.
• Users sensed a Luxurious feeling from the toaster. It was said that the toaster looked like it was made with high-quality materials and components that ensure reliable performance over time. This can give users peace of mind knowing that their toaster will continue to work well and look great for years to come.
• One user pointed out a problem for those who need to toast more oversized items, such as bagels or thick slices of bread, as they may not fit in the toaster.
PRODUCT SHOWCASE
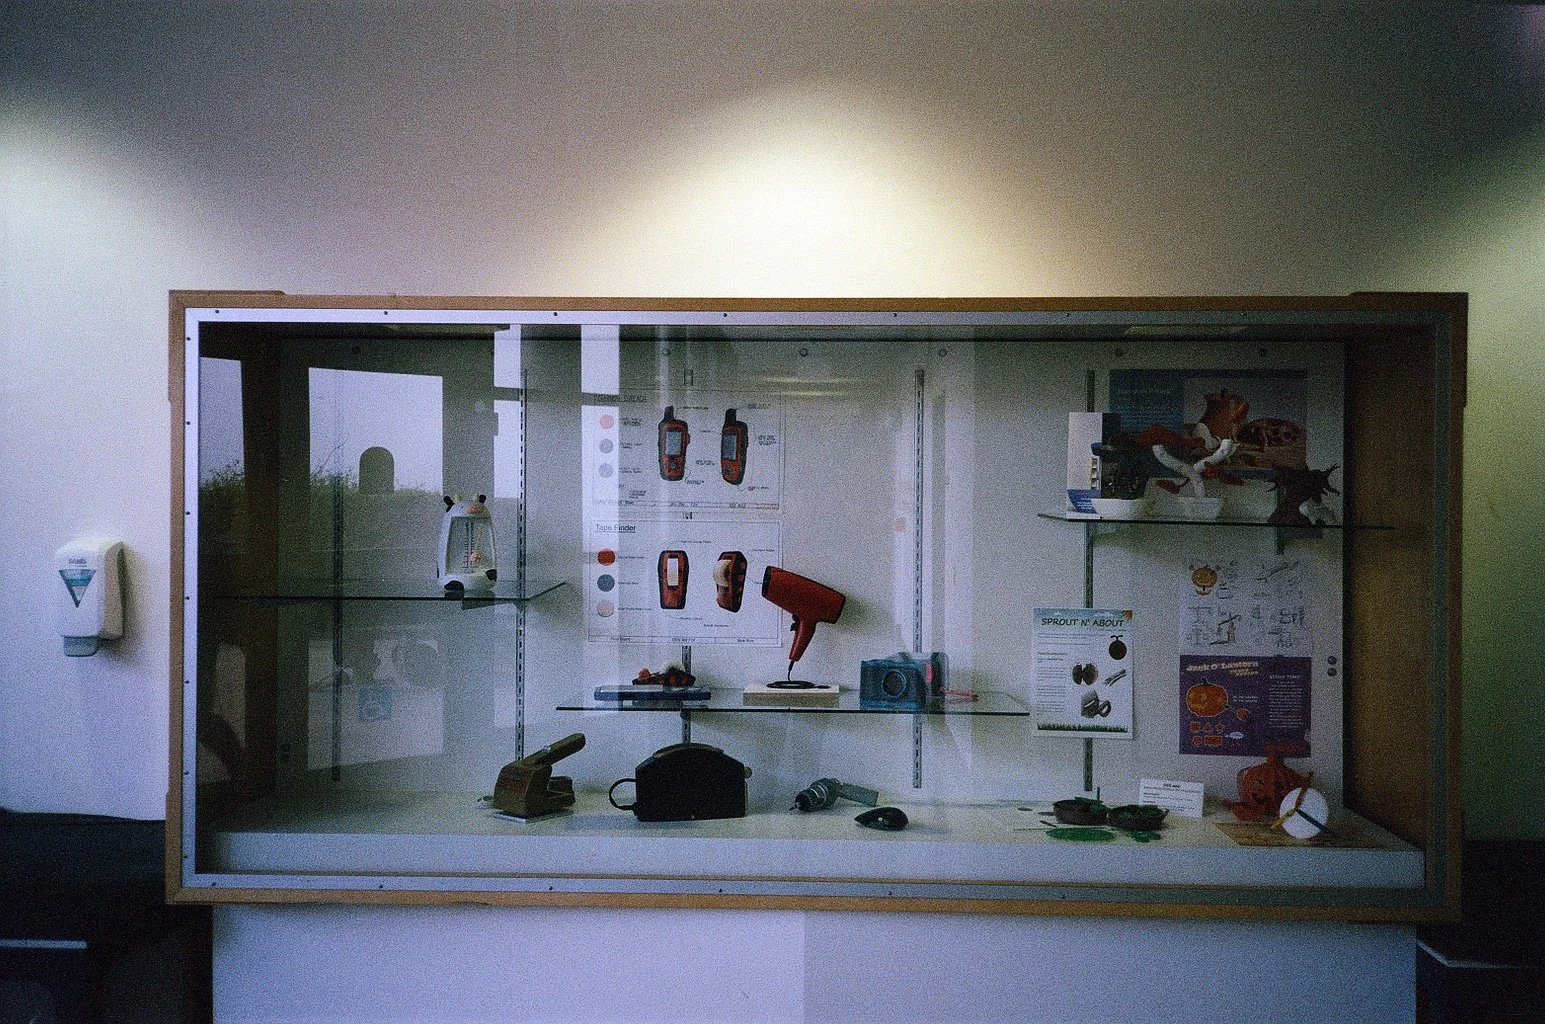
My model was chosen to be presented in the product showcase at SFSU. It's amazing to see my design receive recognition and be displayed alongside other innovative products. The product showcase is a fantastic opportunity for me to demonstrate the features and benefits of my toaster, such as its unique design and ease of use.
